MAKING OF "LITTLE RED CAP" - LANCIA Y COMMERCIAL
INTRODUCTION
This is a team work and my main task was to create a photorealistic, urban, mattepainting background, with near and far buildings, skyscrapers skyline, full moon and starry sky.
Moreover, I had to extent the set below the floor line to simulate the movie is taking place onto a tall building.
The client was an Italian postproduction studio.
They did whole compositing, far buildings models and final packshot.
The scenography has been built into a greenscreen theatre to make easier to isolate background area, where mattepainting had to be positioned.
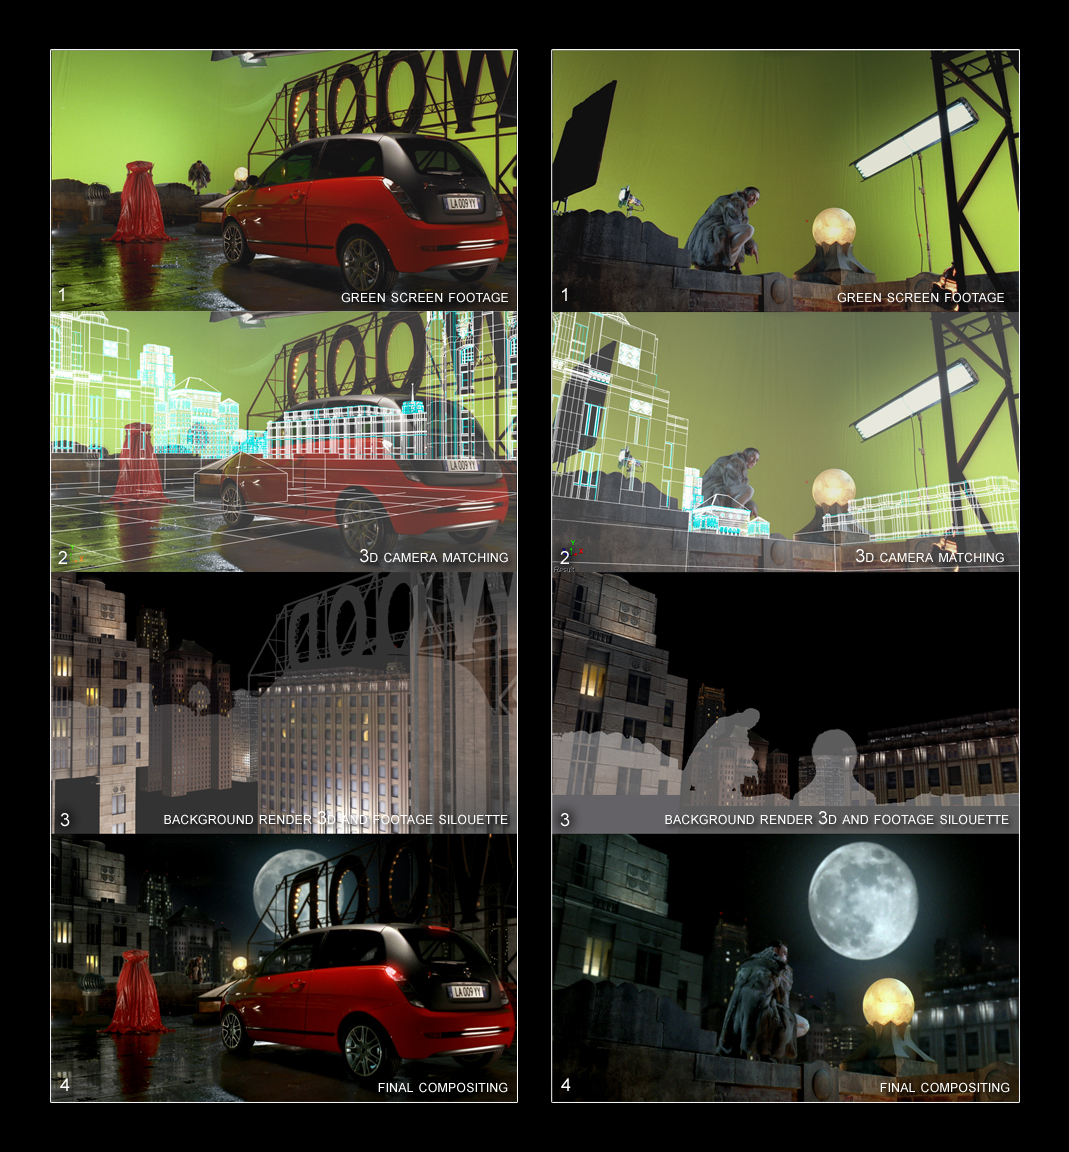
FOOTAGE
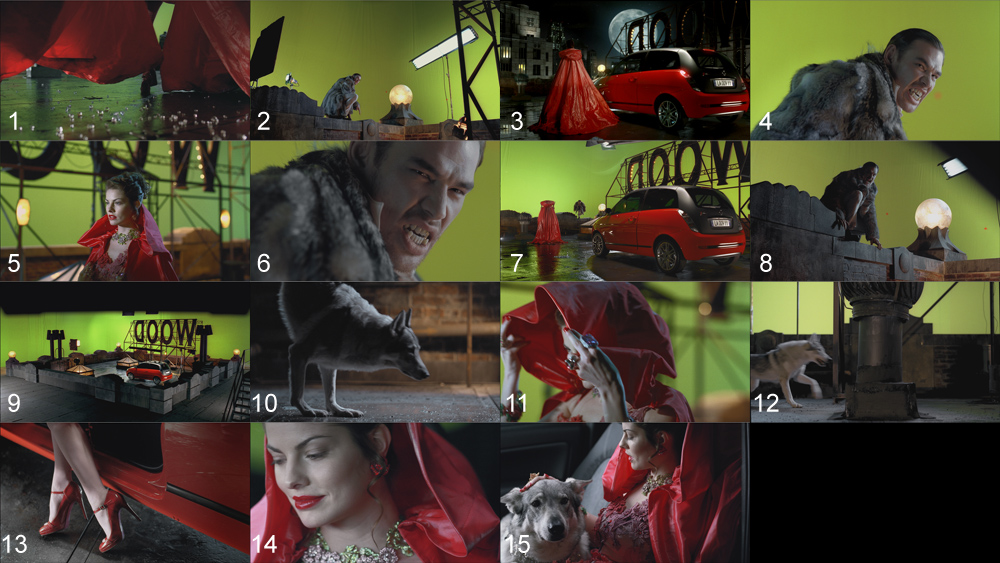
Here below you have the shooting selected scenes.
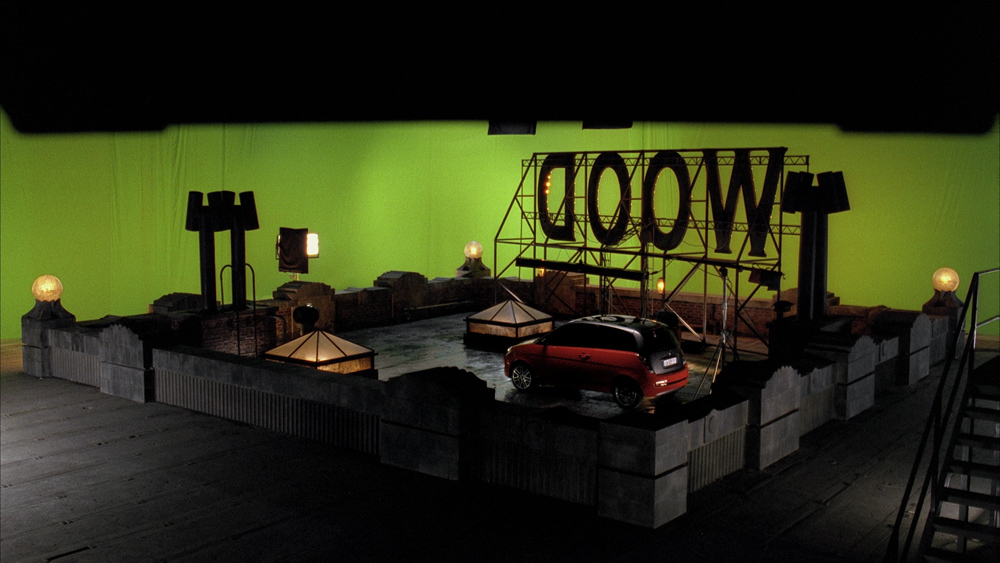
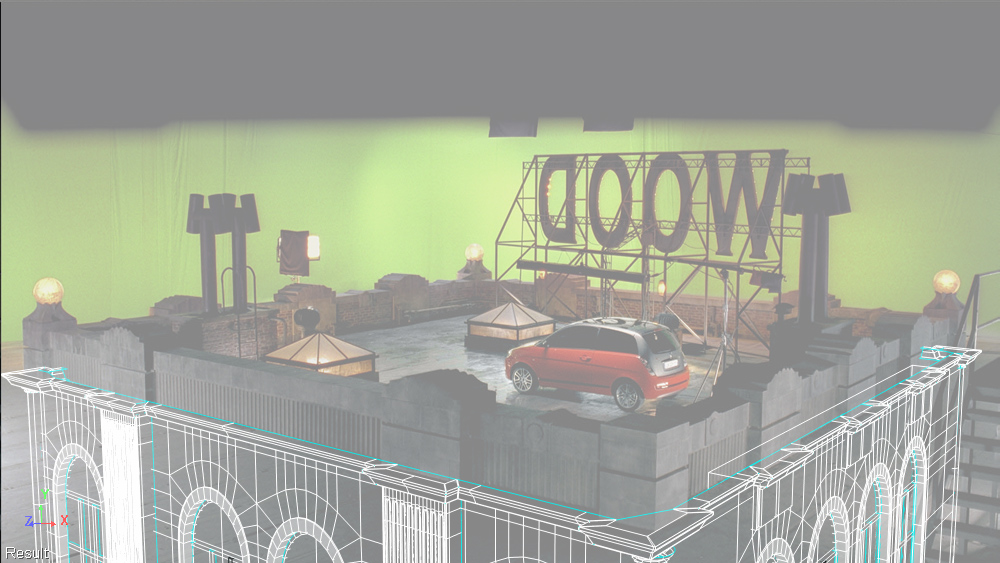
MAIN SCENE GREENSCREEN
This is the main cut to work on, chosen because here we can see the set entirely.
From this one we get the stuff useful for other shots.
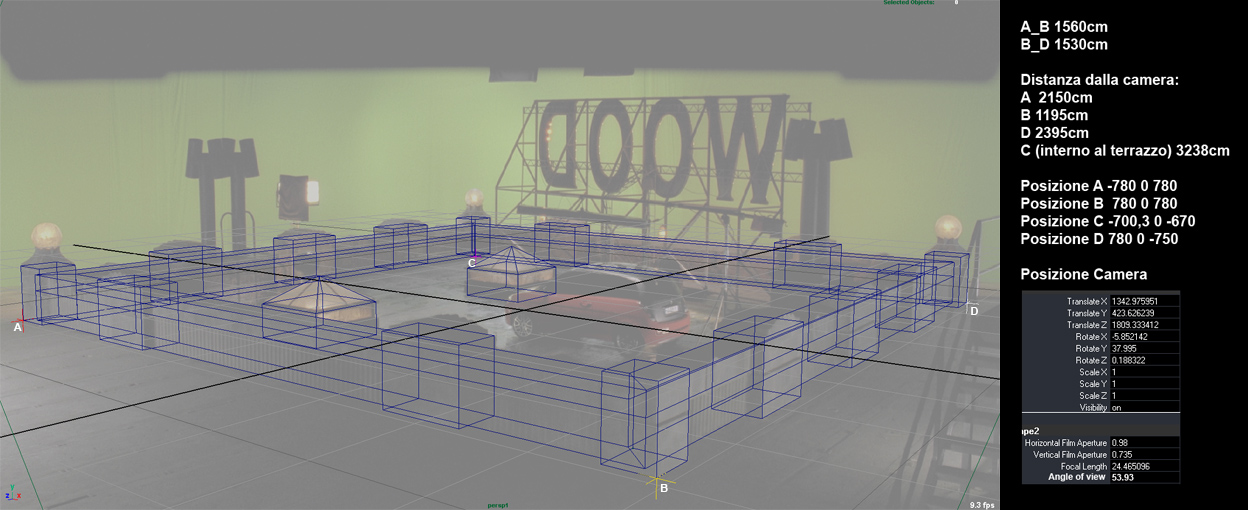
3D CAMERA MATCHING
Here we have client 3d camera matching, done in Maya.
SET EXTENSION MODELLING
I gave camera matching 3d scene and set extension modelling to Gabriele Sina.
He had to follow real set style, in order to match the real and the fake parts.
SET EXTENSION TEXTURING, LIGHING AND SHADING
At this point I worked on final look with textures and lights.
As Gabriele did with modelling, I had to create something matching the real set.
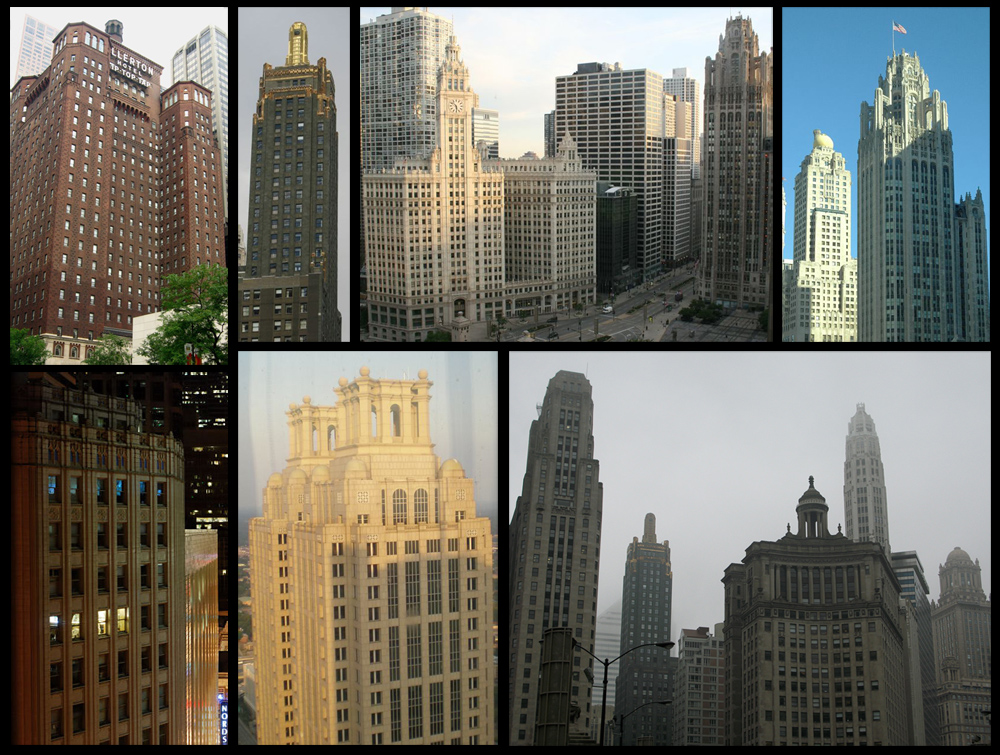
REFERENCES IMAGES FOR BACKGROUND MATTEPAINTING
Now let's talk about background.
After a photographic research we had to choose reference buildings whose look fits with footage.
PHOTOSHOP LAYOUT PROPOSALS
At this point, using selected images, I created a composition in order to decide position and scaling of each background building.
This will permit us to optimize modelling: in render stage far buildings will be less detailed and lighter to calculate than near buildings.
Moreover at this point is important to verify, facing client opinion, if our vision of work is correct.
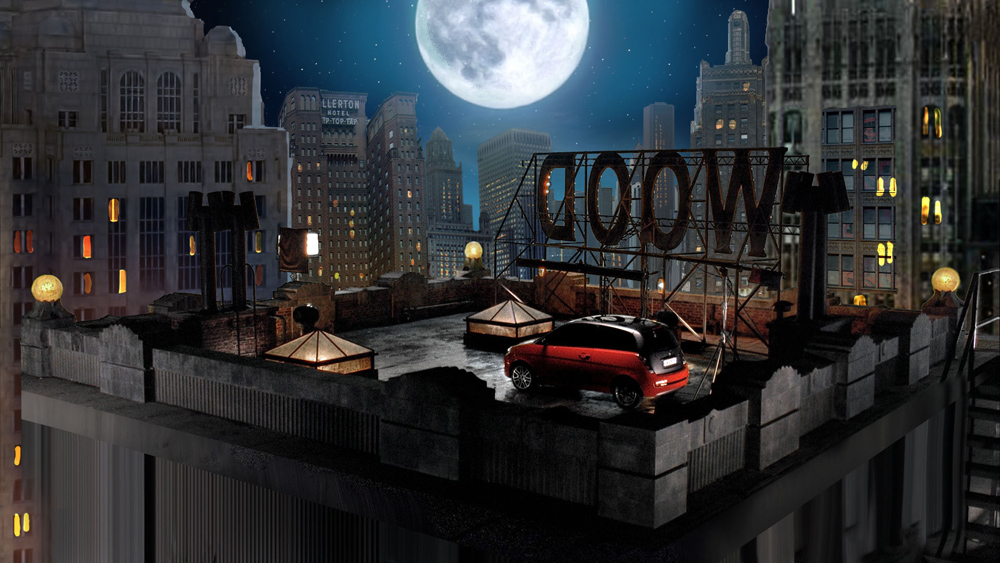
Here below you have two layout proposals.
The second is the one the client chose.
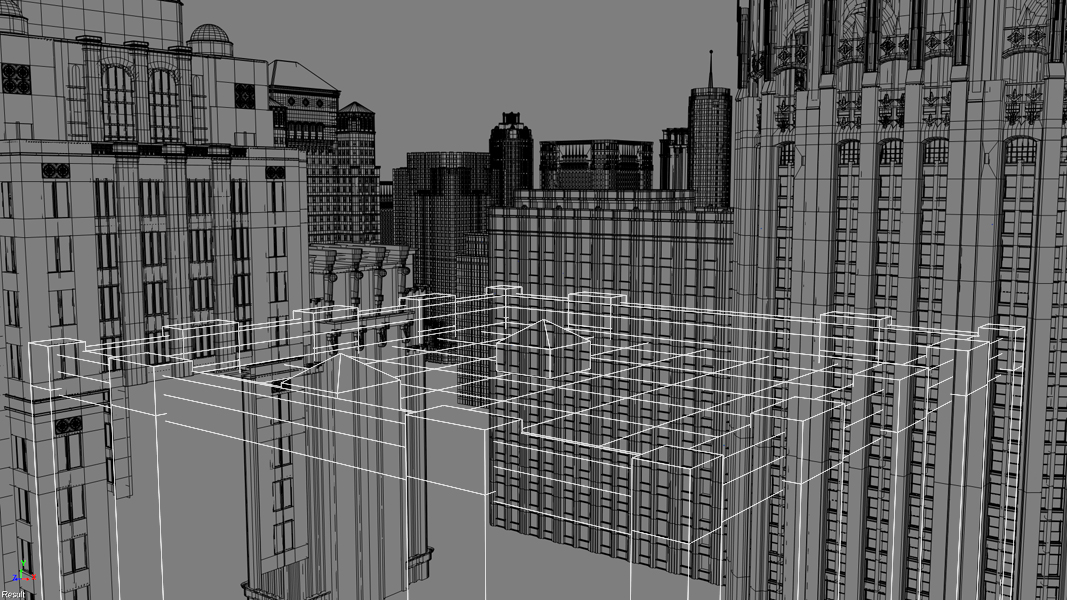
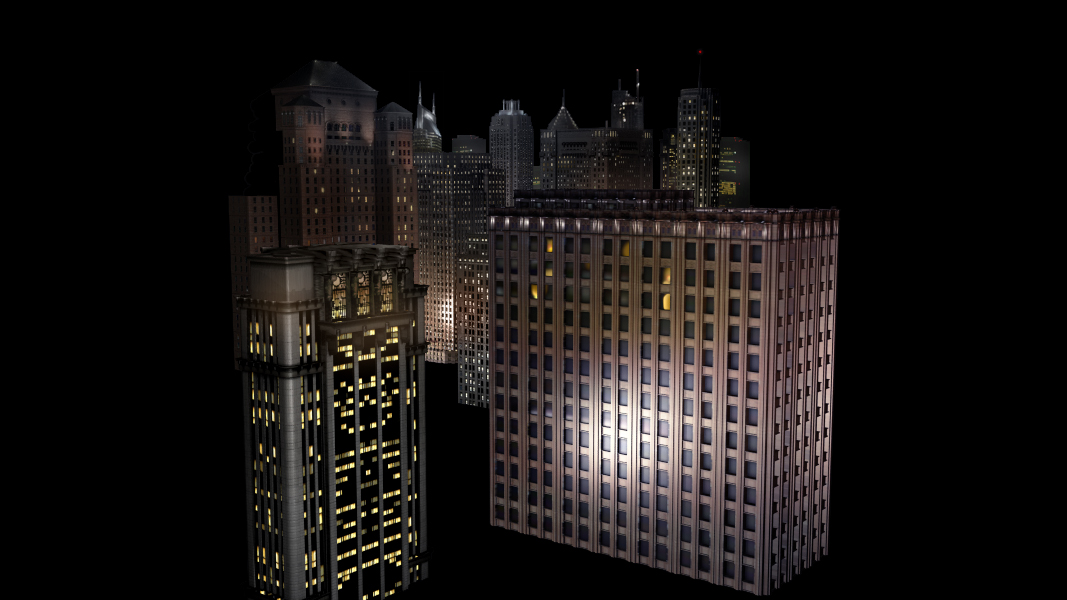
BACKGROUND MODELLING
Here you can see an example of how Gabriele handled modelling stage.
He used a reference image as rotoscope.

All finished models positioned inside 3d scene
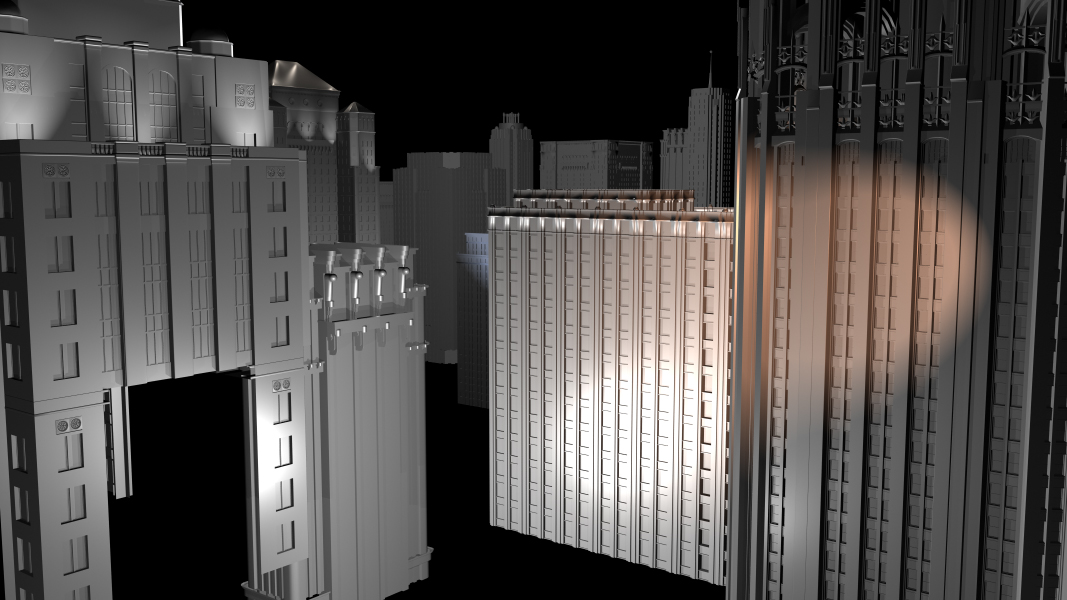
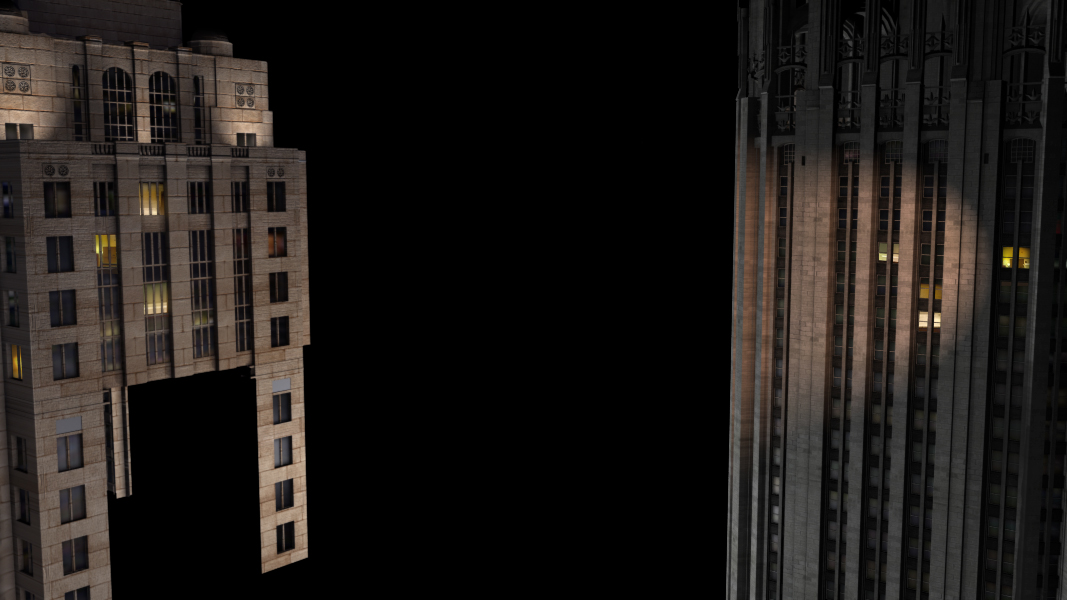
BACKGROUND LIGHTING
In the image below you can see scene lighting on a basic shading.
I had no precise references for lights positions so I had to follow my personal taste and, after texturing, to pay attention on shooting integration.
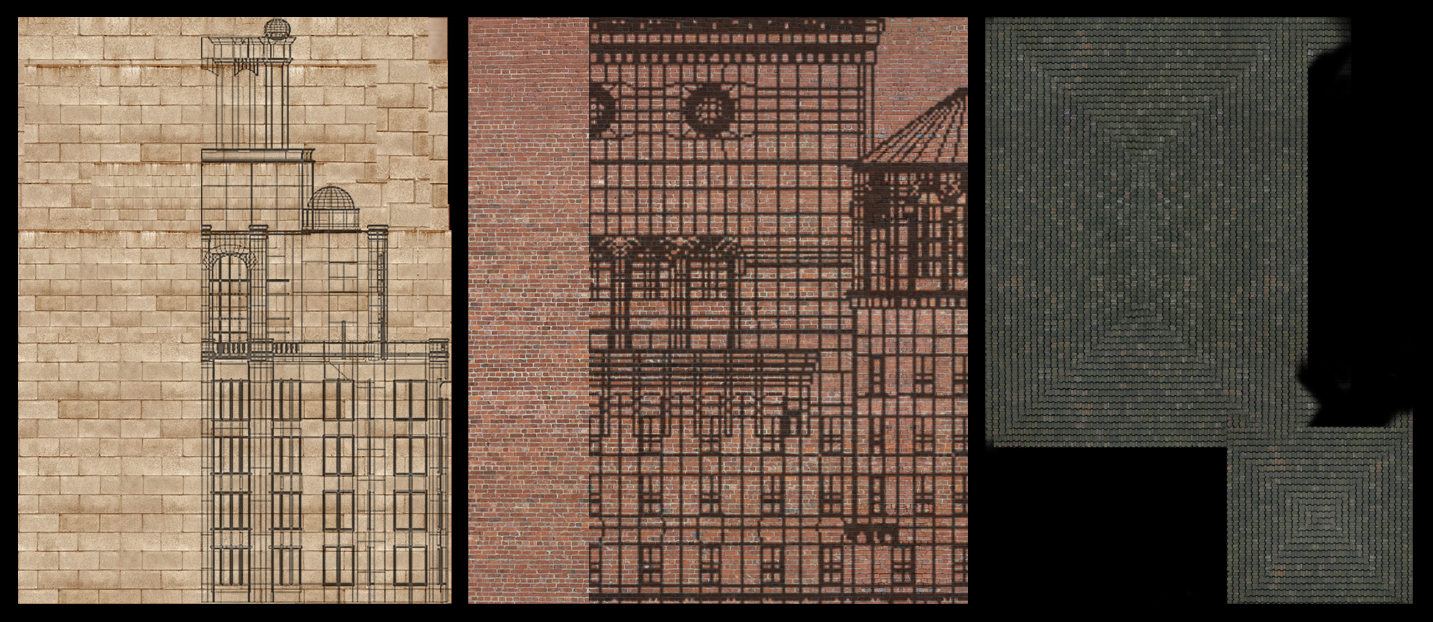
BACKGROUND TEXTURING
In photoshop I built custom-made textures using buildings wireframe as reference.
BACKGROUND RENDERING, ASSEMBLAGE AND PHOTOSHOP FINAL RETOUCHING
Once render is done, I finished work by assembling all parts and finalizing them with color balance, effects and all I need to have the best possible result.
I gave client the mattepainting divided in two planes so he would be able to apply some level shifting in compositing, to simulate a perspective change.
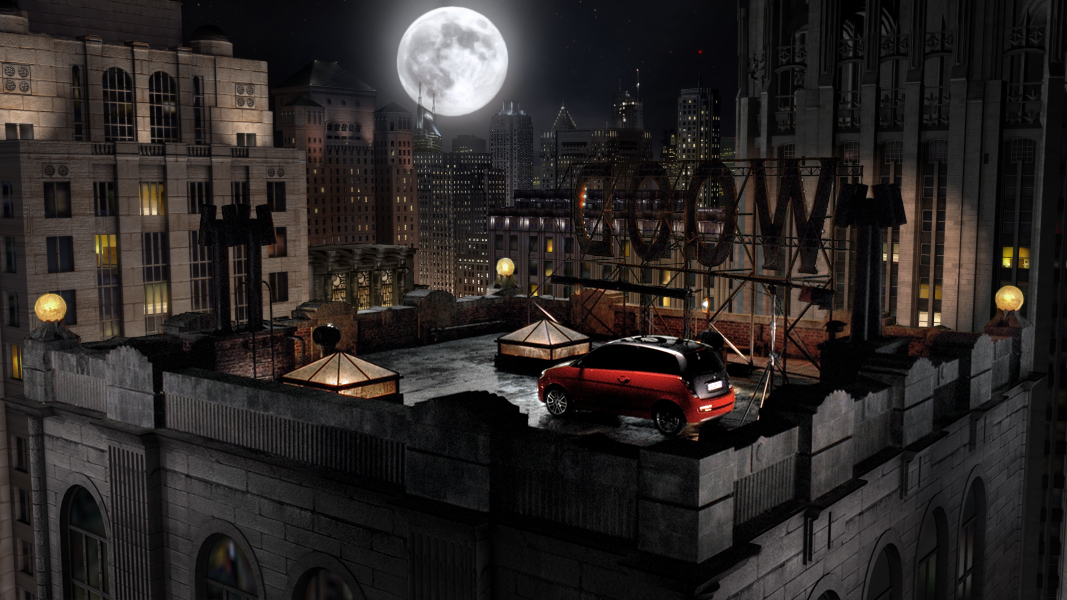
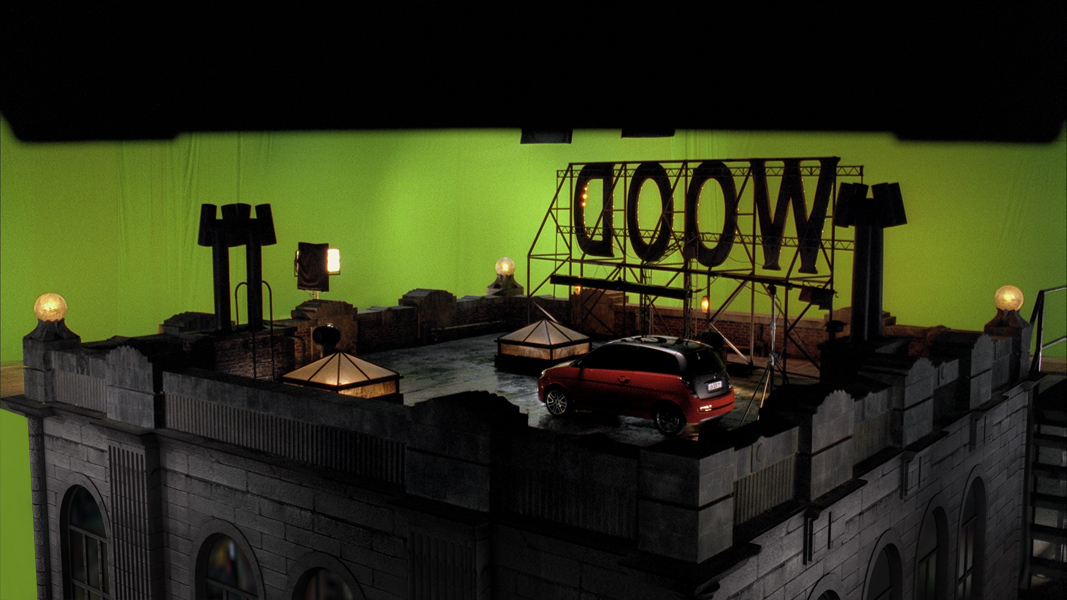
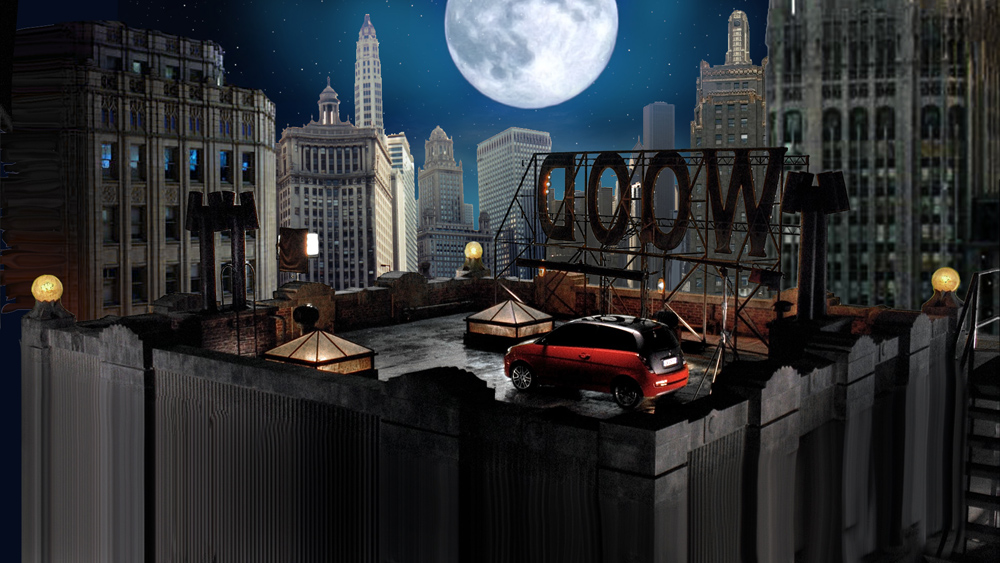
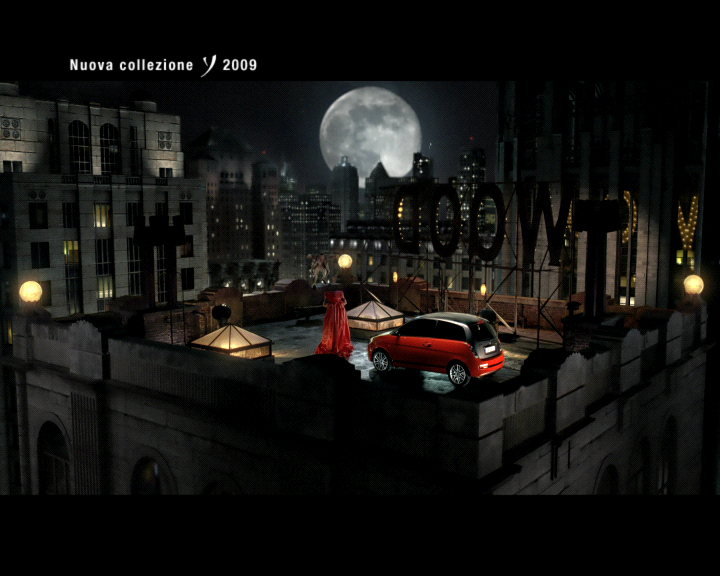
FINAL OUTPUT
This is the final result, after client compositing.
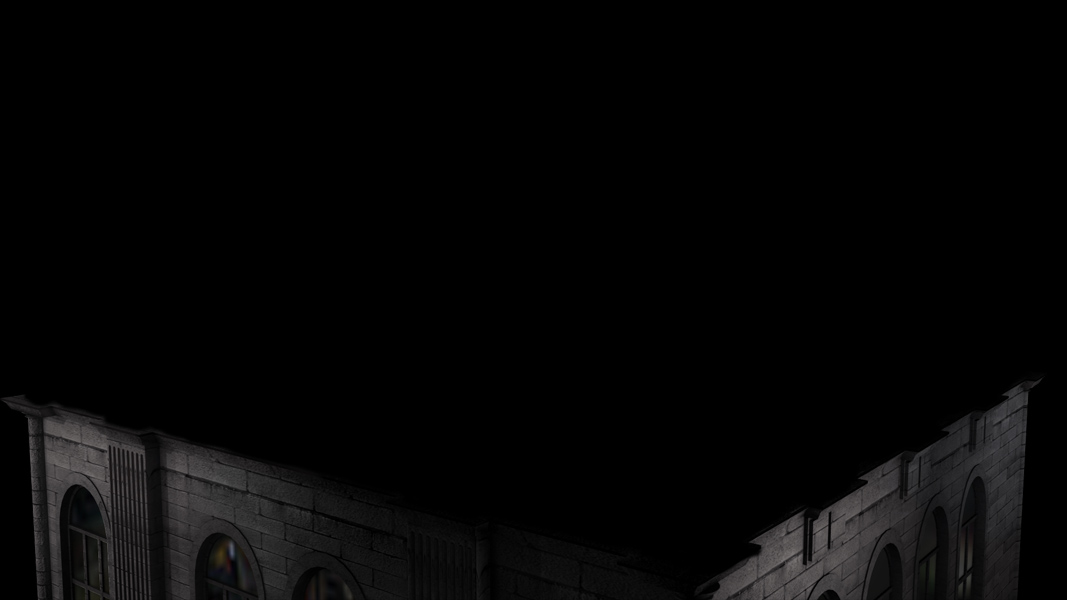
SECONDARY SHOTS
The same procedure is applied to all cuts in the commercial but, as I wrote at the beginning of making-of,
once done the work on the main scene is quite fast to derive secondary shots.
Here below you can see some work steps in other shots.
That's all folks!
Thanks for watching :)